I have been waylaid into 3D printing, not by choice, but by necessity. I’m building a Voron Trident 3D printer from a kit. Estimated time: 40 hours. I paid to have the 100-300 plastic parts required by the project printed by someone else since I did not already own a 3D printer. It took 3 weeks for the parts to arrive and weeks later I still do not have a 100% handle on what was shipped to me or needed.
There is a step in the build process where you have to insert a brass thread receptacle into plastic. This step is called “heat set insert.” That concerned me because I know from woodworking, if you try to eyeball 90 degrees for drilling by hand, you’re rolling the dice. And with threaded inserts, you need to have the threaded screw go in at 90°. If I do not come in at 90°, then I will have ruined the part and then I have to rely on someone else to 3D print a duplicate part. Once I start the building process, I do not want to be interrupted with delays because of a missing or [that I] ruined part.
So I purchased a Sovol SV06 “ACE”. It took me an hour to assemble it and several hours to determine what I did wrong. I ended up having to set the tension and then run tests to prove I had a correct tension. See: Motions Diagnostics Suite.
Unfortunately, the substance I want to print with gives off toxic fumes during the printing process so it is essential I vent the fumes out of the house.
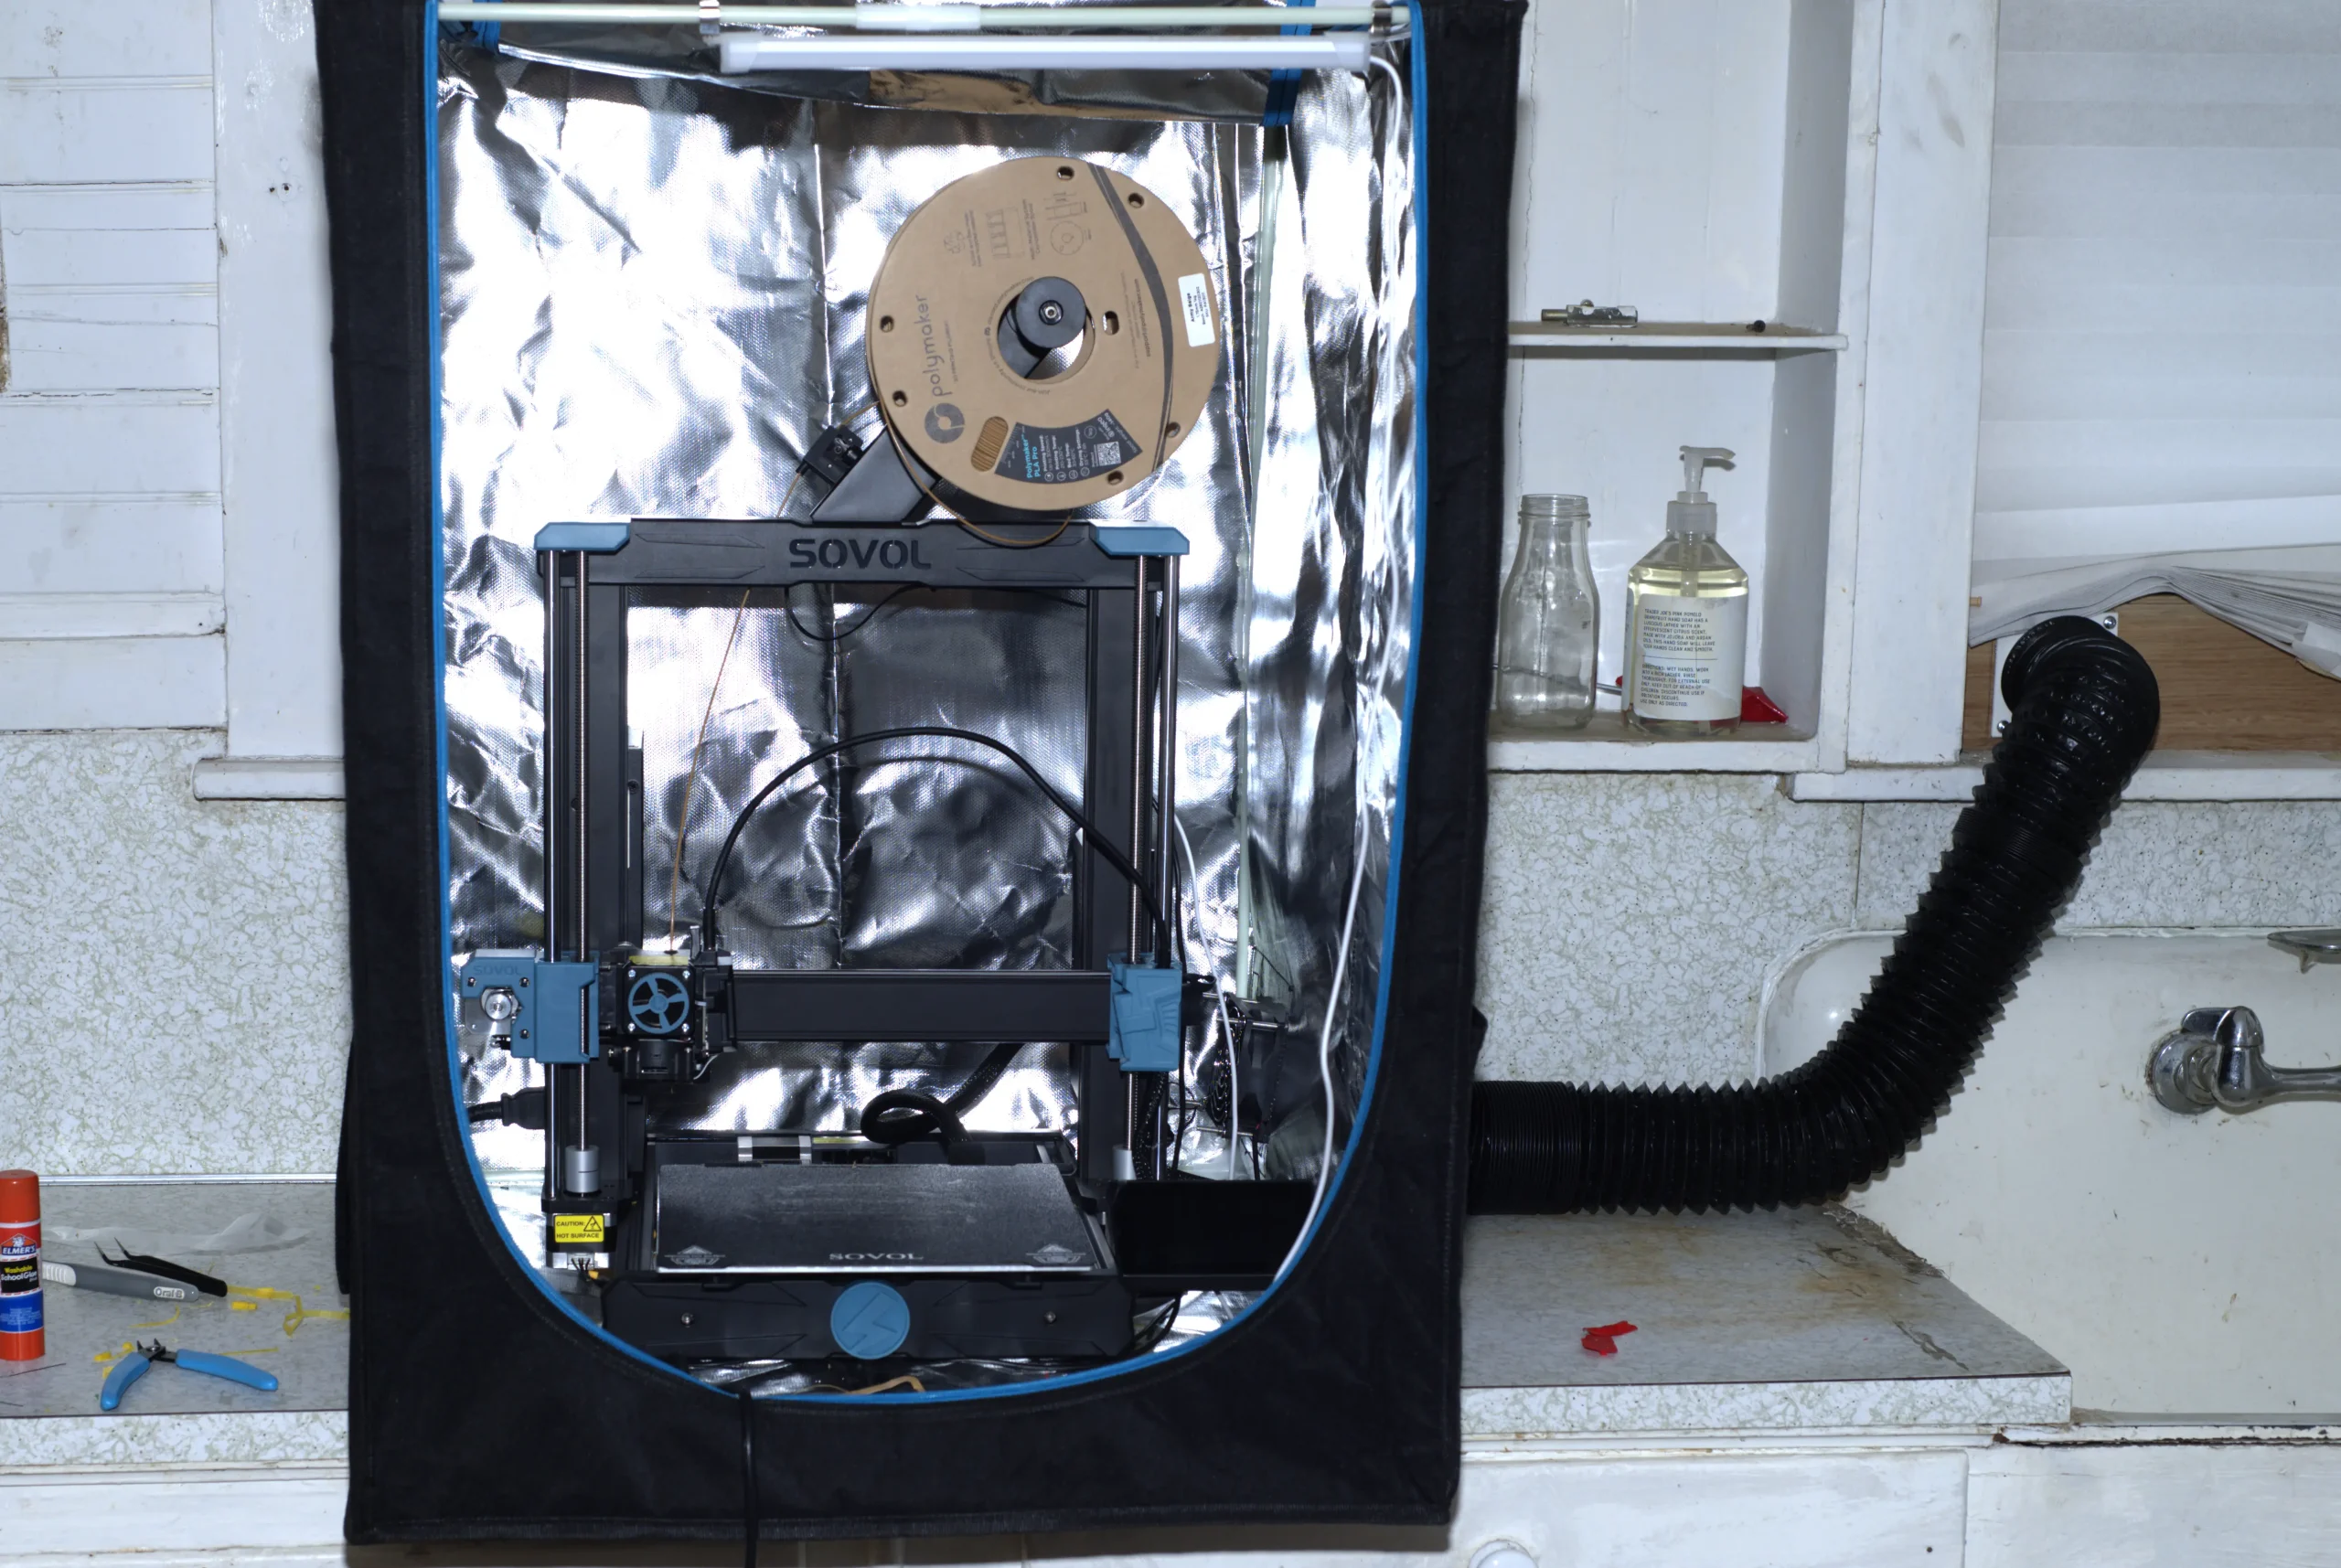
Here’s a photo of the YOOPAI “3D Printer Enclosure with Ventilation Kit” with my SV06 printer inside and the duct leading to the newly built duct flange attached to a board fitting in a double-hung window casement.
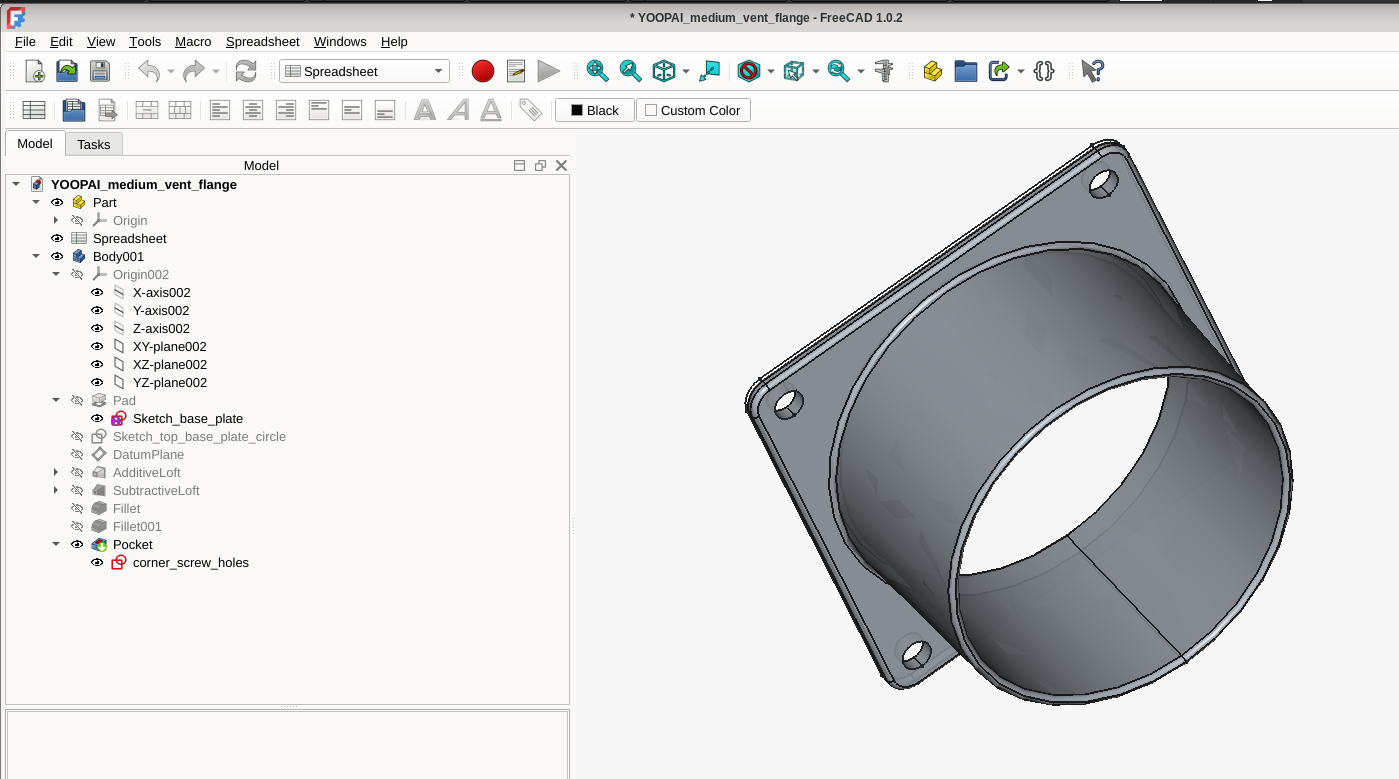
The kit provides a flexible duct (the black duct on the right) — what you do at the other end of the flexible duct is up to you. So I decided I would build a transition that the flexible duct would fit over and then the other side could be affixed to a board which fits under a double-hung window. I used the included YOOPAI transition from the fan to duct as a model to duplicate in the 3D drawing in the software FreeCAD (free and open source). This served as an excellent exercise to create a model in FreeCAD and have a finished product to compare with. Working in and learning FreeCAD was a struggle, and it consumed a lot of time as ChatGPT was out of date with the software and FreeCAD’s changes to tools were not in ChatGPT’s ken. I also have my prejudices from 30 years of using other design software and as a software programmer. After several days, I finally was able to model a duplicate of the YOOPAI transition.
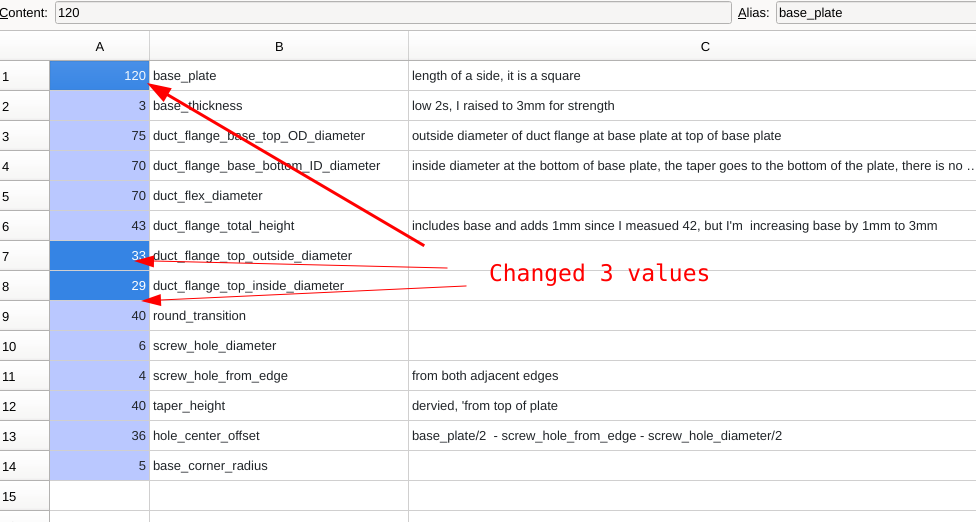
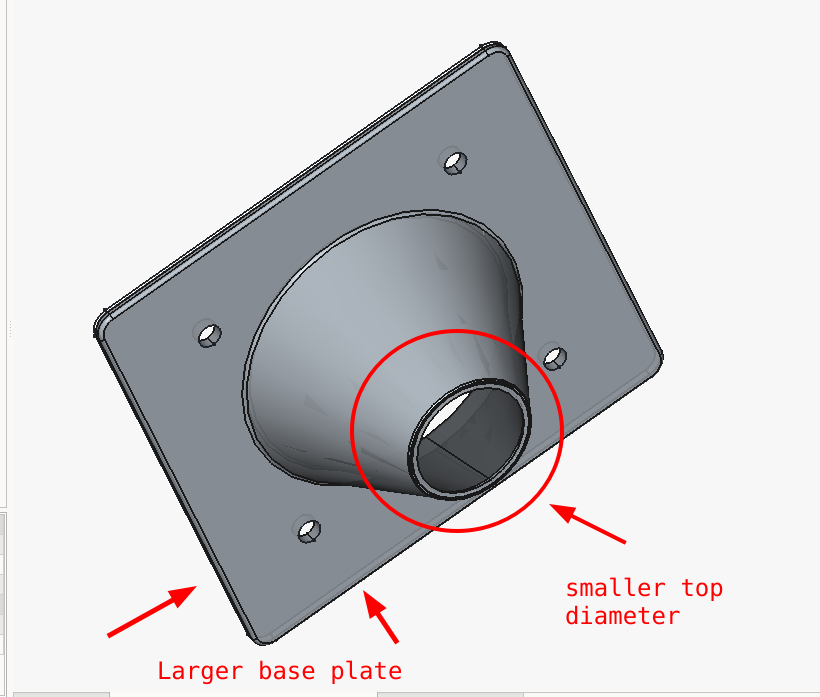
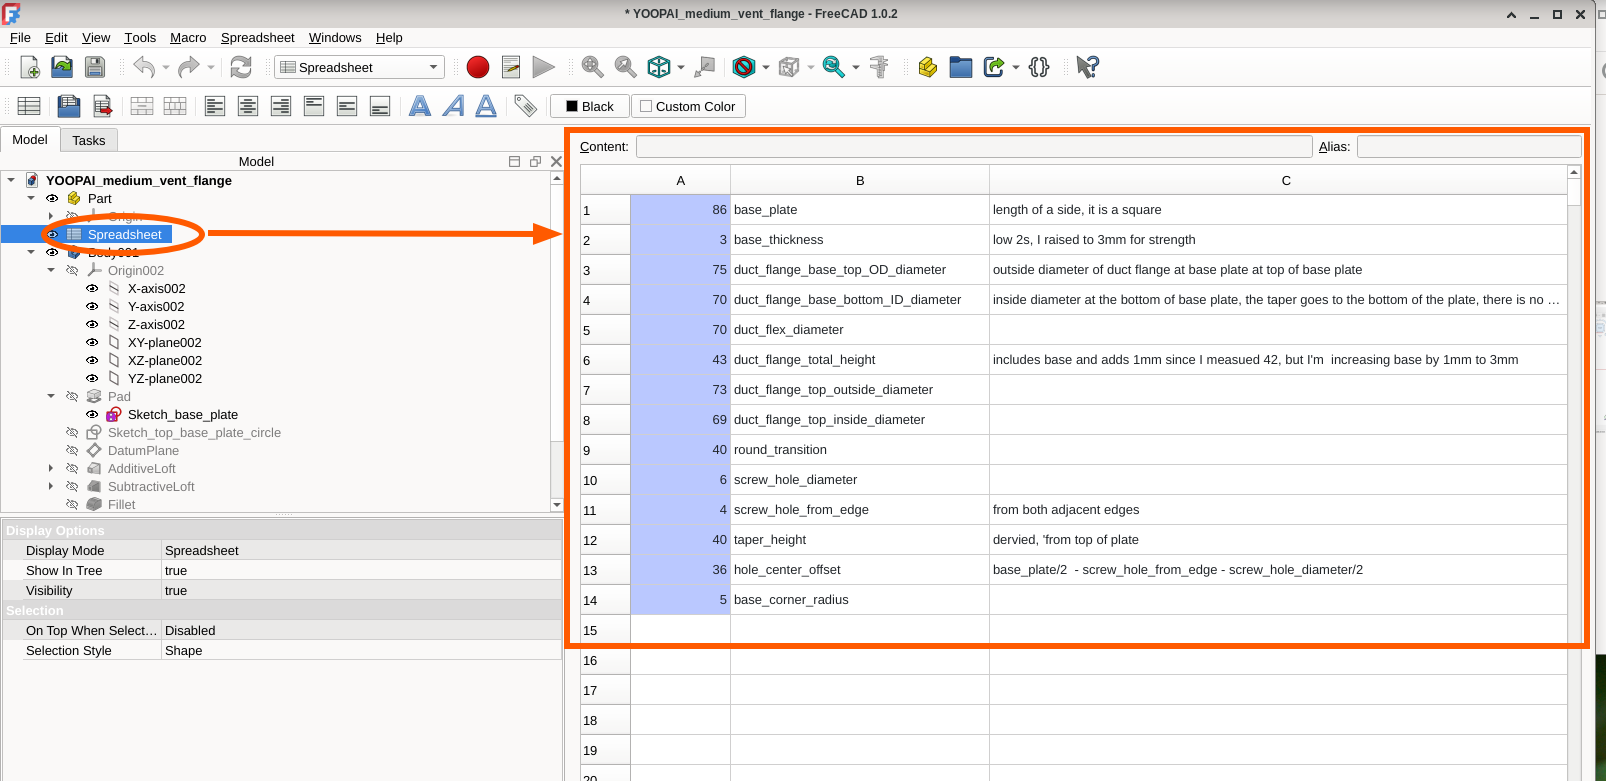
And the bonus for creating the model from scratch is that I utilized “parametric design.” Parametric design simply means I can have a spreadsheet of values representing various measurements and dimensions and I can instantly change the design just by updating the spreadsheet. The model i built will automatically reconfigure itself based on the values in the spreadsheet.
For example, the current plate dimension is increased to 120mm from 86mm and the top of the cone reduced (73 -> 33 & 69 -> 29), here the model is instantaneously and faithfully created with the changes.
Parametric design makes the model very useful for others who have different dimension needs.
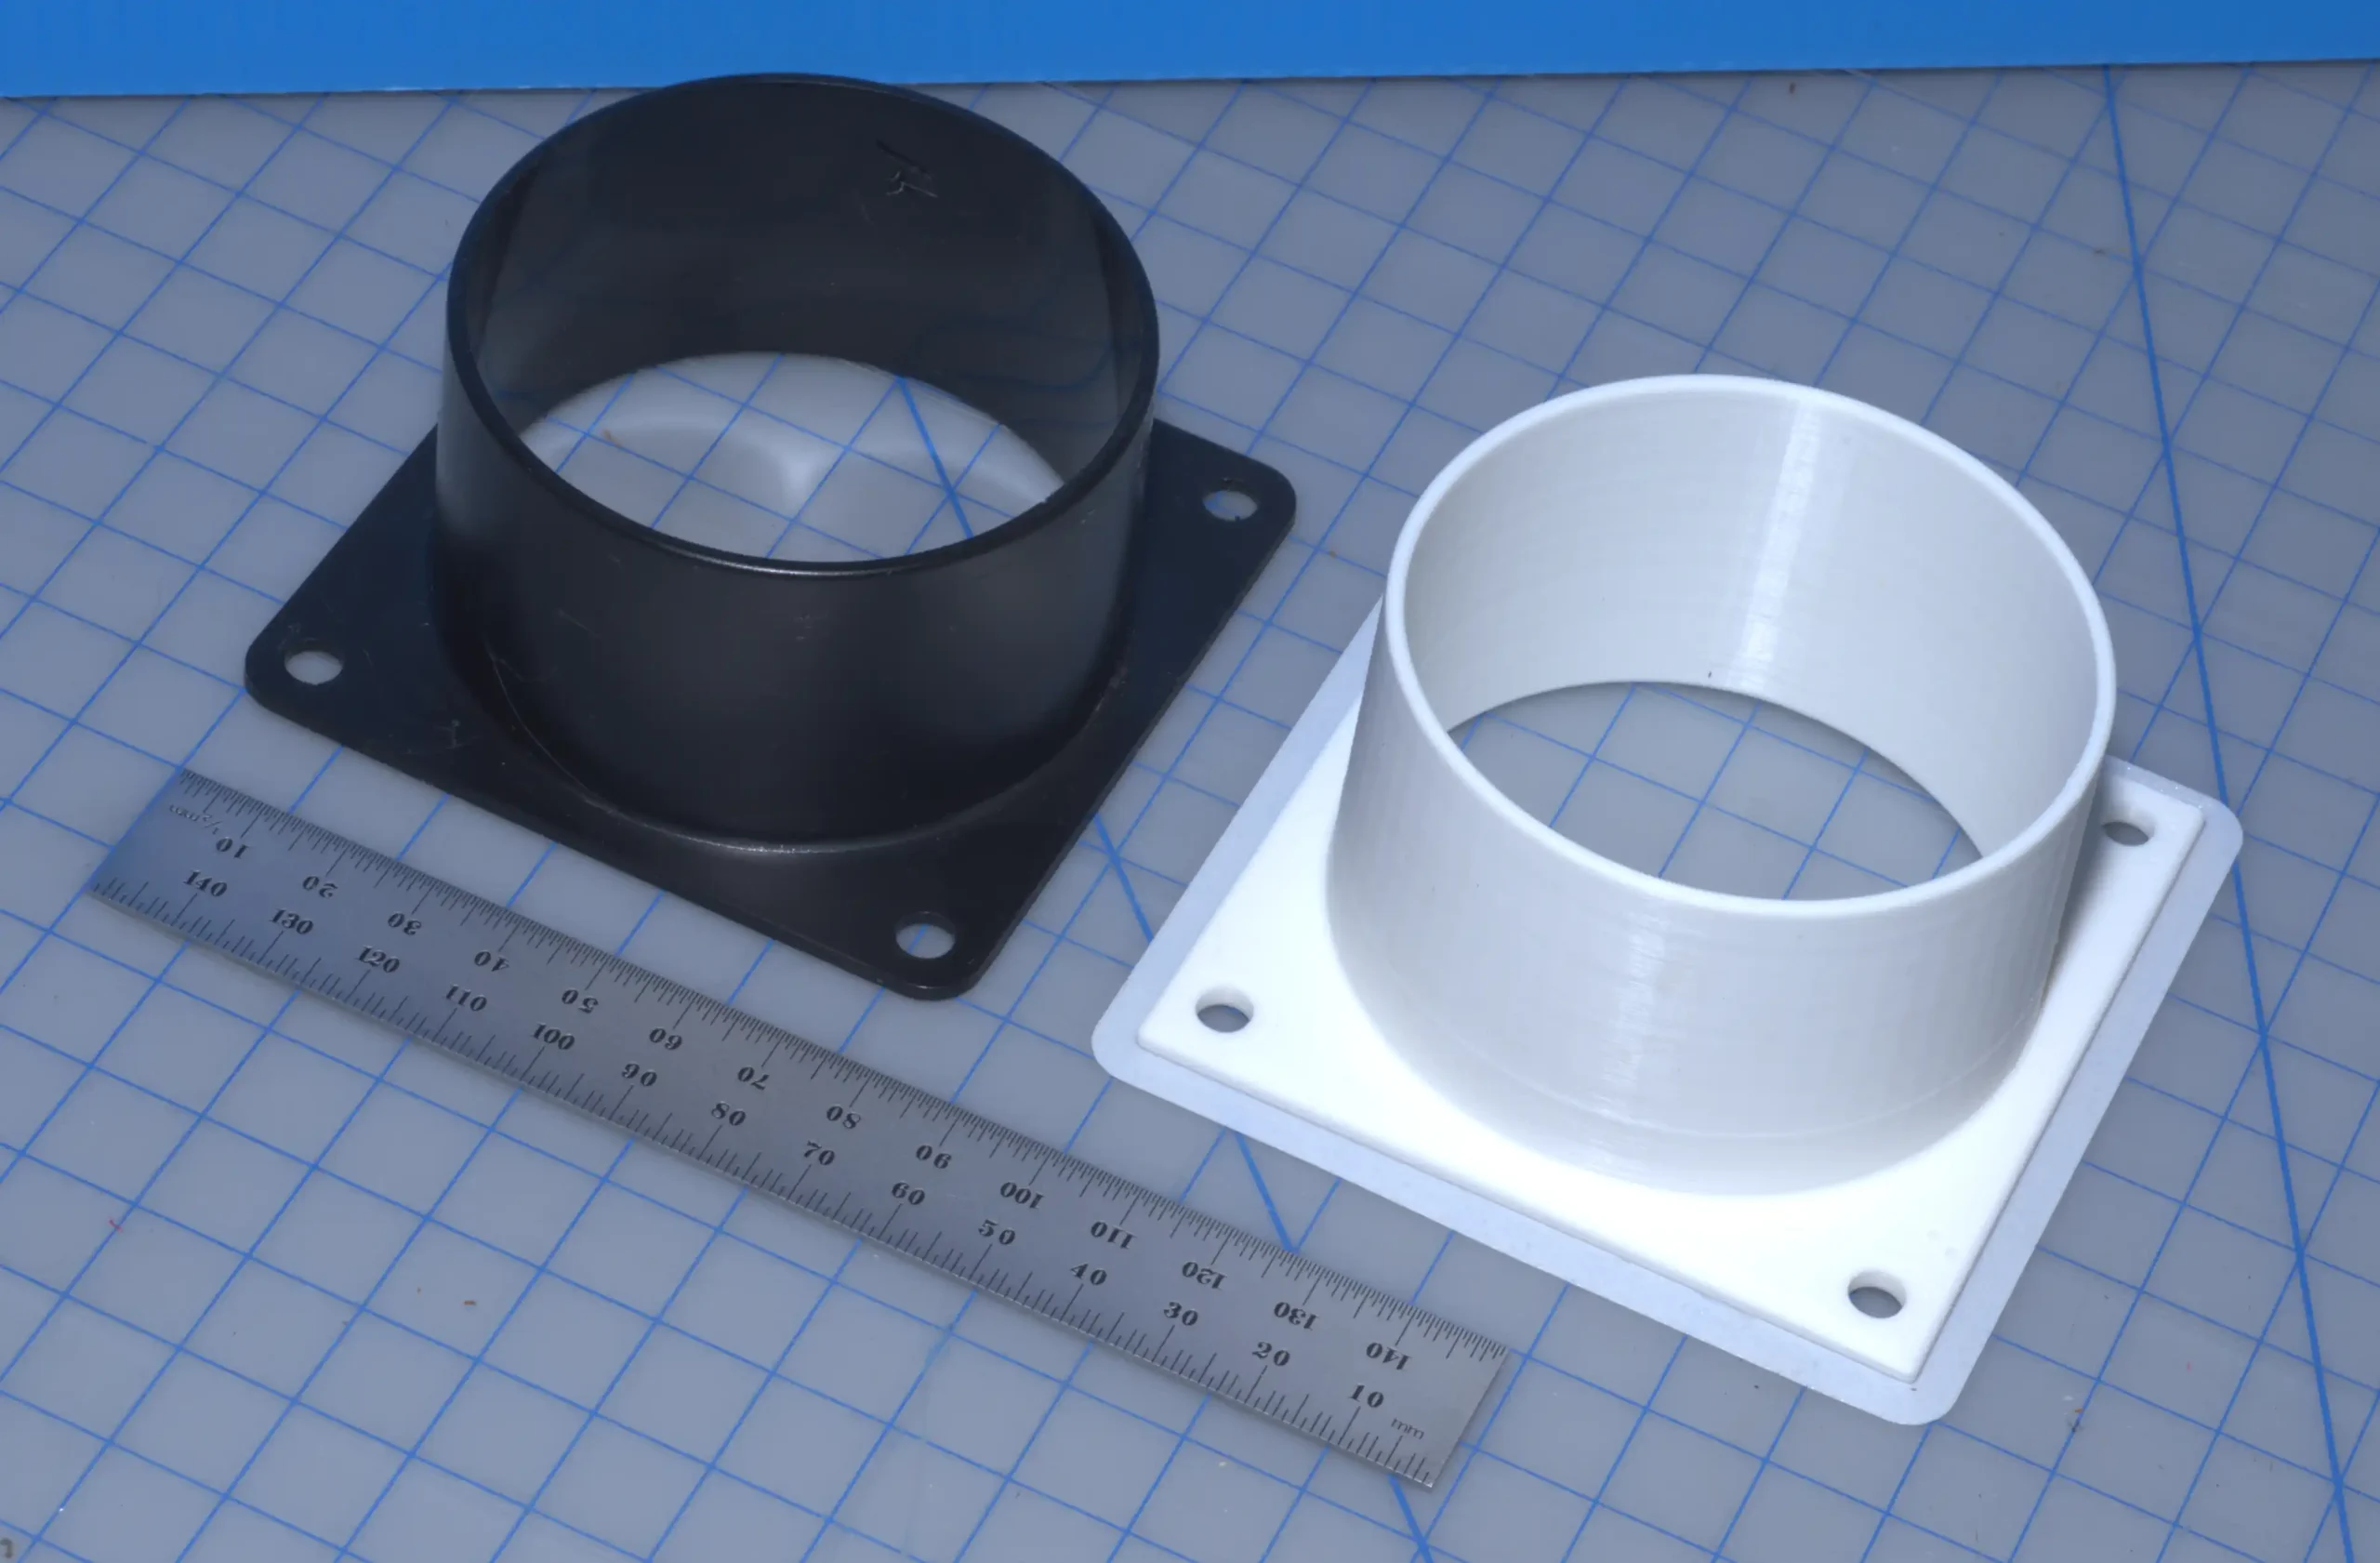
The photo at the top of this blog show the YOOPAI part, in black, and the replica I design and printed, in white. I forgot to round the corners of the base, so my replica is off in that it has square corners for the base. (I’ve fixed that by rounding the corners in the model I have released below.)
Here’s the spreadsheet for the transition:
Here’s the model of the YOOPAI transition which you can view and manipulate in 3D:
I’ve placed what I design on my code server (Forgejo) so anyone can duplicate what I did, print their own, and use my model for their own transitions. I have also included both the filament and process specifications so one can duplicate exactly what I used in Orca Slicer. The code is at:
https://salemdata.net/repo/jlpoole/round_to_window_slot_duct_transition.git
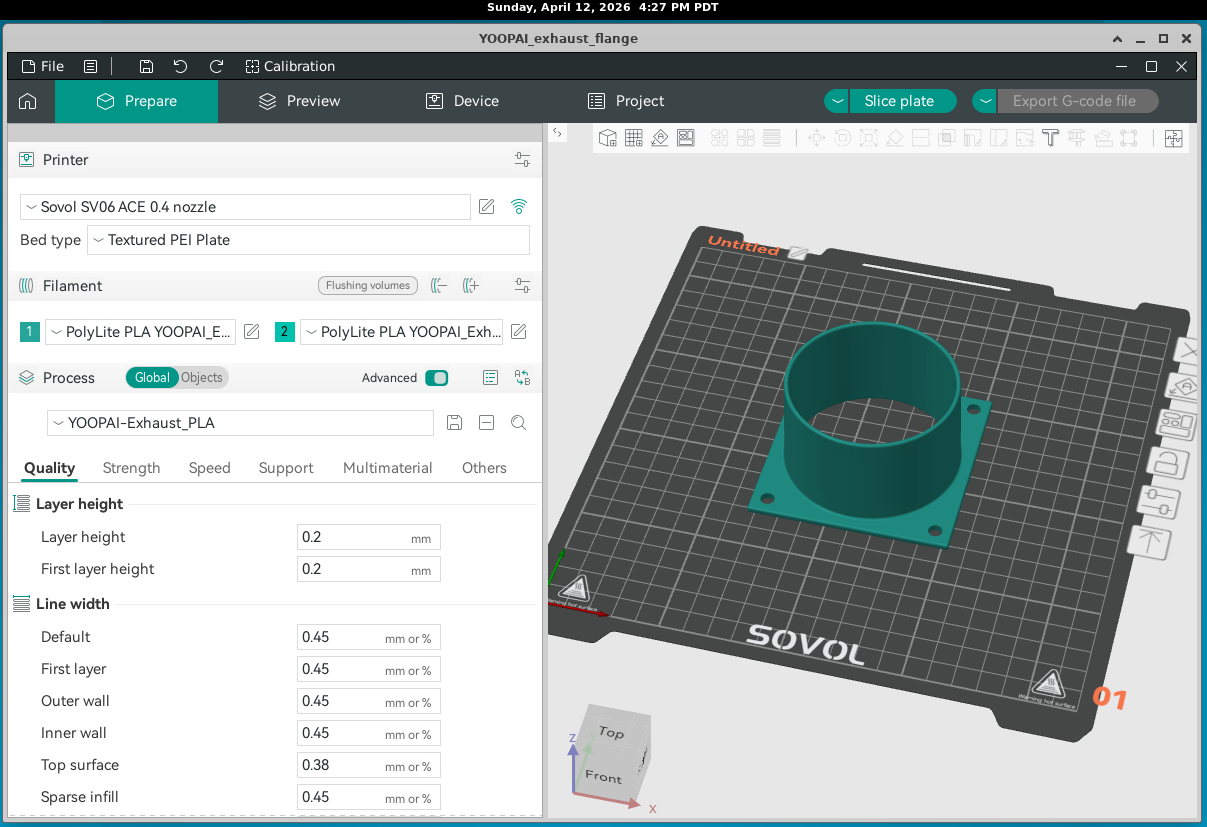
Here is a screenshot of the model appearing in Orca Slicer (version OrcaSlicer_Linux_AppImage_V2.3.0.AppImage):
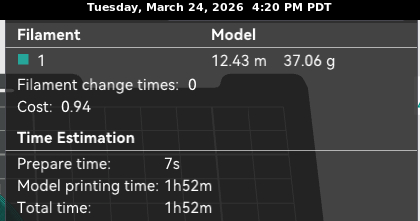
The printing took 1 hour 52 minutes.
Leave a Reply